Machame Route: Route Overview, Difficulty, Success Rates, Itinerary, and Expert Tips;Climbing Mount Kilimanjaro is a remarkable adventure that challenges your body, builds confidence, and rewards you with some of the most beautiful scenery in Africa. Standing at 5,895 metres above sea level, Kilimanjaro is the highest mountain in Africa and one of the world’s most famous trekking destinations. For climbers hoping to reach Uhuru Peak, the highest point on the mountain, choosing the right route is an important part of preparing for the journey.
The Machame Route is one of the most popular ways to climb Kilimanjaro. Often called the Whiskey Route, it is known for its scenic landscapes, varied terrain, and opportunities to experience the mountain’s different ecological zones. The trail passes through dense rainforest, open moorland, rocky alpine terrain, and the high-altitude landscape near the summit. Along the way, climbers encounter changing views of the mountain, dramatic volcanic formations, and wide-open landscapes that make the trek memorable.
Machame is particularly appealing to adventurous travellers who want a challenging climb with beautiful scenery and a well-designed acclimatisation profile. Most itineraries take six or seven days on the mountain, although a seven-day climb generally gives trekkers more time to adjust to the altitude. While the route does not require technical climbing skills in normal conditions, reaching the summit demands physical preparation, patience, determination, and careful attention to the guidance of experienced mountain guides.
This guide explains the Machame Route in detail, including its main features, difficulty level, summit success rates, day-by-day itineraries, best time to climb, and practical tips to help you prepare for a successful Kilimanjaro adventure.
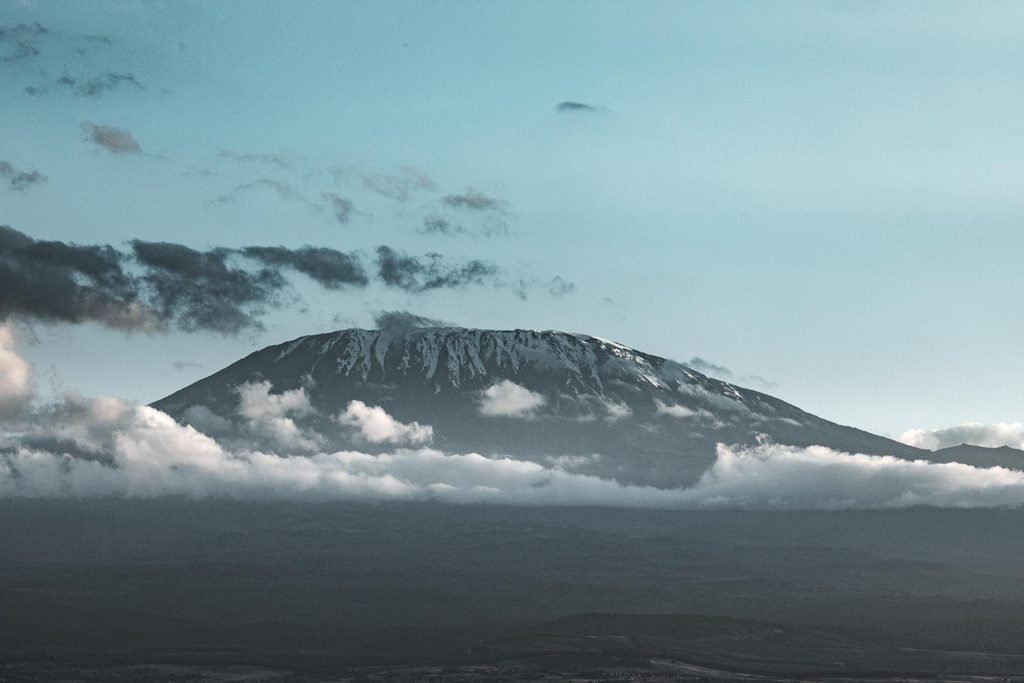
1. Machame Route Overview: Route Overview, Difficulty, Success Rates, Itinerary, and Expert Tips
The Machame Route approaches Mount Kilimanjaro from the southern side of the mountain. It begins at Machame Gate, where climbers register with the park authorities before entering the rainforest. From there, the trail gradually climbs through several distinct vegetation zones before joining the southern circuit of Kilimanjaro and continuing towards the summit.
One of the route’s greatest strengths is its scenic variety. During the first days, trekkers walk beneath tall trees and through thick forest, where the air is often cool and humid. As the trail gains elevation, the forest gives way to heathland and moorland, with giant groundsels, lobelias, and unusual high-altitude plants becoming part of the landscape. Higher up, the vegetation becomes sparse, and the terrain changes to rock, scree, and exposed volcanic ground.
The route also provides opportunities for gradual acclimatisation through its climbing profile. On several days, trekkers climb to a higher elevation before descending to sleep at a lower camp. This approach, commonly described as “climb high, sleep low,” can help the body adjust to altitude. However, acclimatisation varies from person to person, and following a suitable itinerary does not eliminate the risk of altitude sickness.
Most Machame climbs use tents at designated campsites rather than mountain huts. This makes the route suitable for travellers who enjoy a camping experience and do not mind spending several nights outdoors. A professional mountain crew normally supports the expedition by preparing meals, carrying group equipment, setting up camp, and helping the team follow the planned route.
Key facts about the Machame Route
- Mountain: Mount Kilimanjaro, Tanzania
- Highest point: Uhuru Peak, 5,895 metres
- Starting point: Machame Gate
- Typical duration: Six or seven days on the mountain
- Accommodation: Tented camps
- Difficulty: Challenging, mainly because of altitude and long trekking days
- Technical climbing skills: Not normally required under standard trekking conditions
- Best suited for: Trekkers with reasonable fitness who are prepared for long walking days and high-altitude conditions
- Common descent route: Mweka Route
Although Machame is accessible to many first-time mountain trekkers, it should not be considered an easy walk. The altitude, changing weather, steep sections, and summit-night conditions make proper preparation essential.

2. How Difficult Is the Machame Route?:Machame Route: Route Overview, Difficulty, Success Rates, Itinerary, and Expert Tips
The Machame Route is generally considered a challenging trek. Its difficulty comes less from technical climbing and more from the combination of altitude, distance, uneven terrain, weather, and the physical demands of walking for several consecutive days.
During the lower sections, the trail passes through forest and can be muddy or slippery, particularly after rain. As the climb continues, the landscape becomes more exposed, and some sections involve steep ascents over rocks and volcanic ground. The Barranco Wall is one of the route’s most memorable features. Although it can look intimidating from below, most trekkers negotiate it by walking carefully and following their guides’ instructions. It is a scrambling section rather than a technical rock-climbing pitch on the standard route.
The greatest challenge is usually the altitude. As you climb higher, the amount of available oxygen decreases, making ordinary activities feel more demanding. You may notice that your breathing becomes heavier, your walking pace slows, or your appetite and sleep change. These effects can occur even if you are physically fit.
Summit night is often the most demanding part of the expedition. Climbers typically leave high camp around midnight and ascend in darkness towards Stella Point before continuing along the crater rim to Uhuru Peak. The climb can take several hours in freezing temperatures, with wind and loose volcanic scree adding to the challenge. After reaching the summit, trekkers descend to lower camps, often while already tired from the overnight effort.
Fitness helps, but it does not guarantee that you will reach the summit. A strong runner or gym enthusiast may still struggle with altitude, while a moderately fit person who walks steadily, follows the guide’s pace, and acclimatises well may perform very successfully.
Physical Preparation for the Machame Route
Preparing several weeks or months in advance can make the experience more manageable. Focus on building endurance rather than trying to become exceptionally fast or strong. Long walks, hiking on hills, stair climbing, and steady cardiovascular exercise are useful ways to prepare. If possible, practise walking for several hours while carrying a light daypack.
Strength training for the legs, hips, and core can also help you manage uneven ground and long descents. Make time for recovery between training sessions, and use your practice hikes to test your boots, socks, clothing layers, and backpack.
A good preparation plan should include:
- Regular walking, hiking, or other aerobic exercise.
- Longer weekend hikes that gradually increase in duration.
- Practice on hills or stairs to prepare for sustained climbing.
- Comfortable, well-tested hiking boots.
- Training with the daypack you expect to carry on the mountain.
- Adequate rest, hydration, and balanced meals.
If you have a medical condition or concerns about exercising at high altitude, seek advice from a qualified healthcare professional before booking your climb.

3. Machame Route Success Rates
Summit success rate refers to the percentage of climbers who reach Uhuru Peak compared with the number who begin the climb. The Machame Route is often associated with encouraging summit results, particularly when climbers choose itineraries that allow more time for acclimatisation.
However, there is no single success-rate figure that applies to every expedition. Results vary depending on the length of the itinerary, the season, the experience and practices of the guiding team, the health of the climbers, and the way success is measured. Some figures refer to reaching Stella Point, while others count only climbers who stand at Uhuru Peak. These measurements should not be treated as interchangeable.
In general, a seven-day Machame itinerary offers more time for acclimatisation than a six-day itinerary. The additional day can provide a better opportunity for the body to adjust to increasing elevation, although it cannot guarantee summit success. Some trekkers may still need to descend early because of altitude-related symptoms or other medical concerns.
The most important factor is not simply selecting a route with an attractive advertised success rate. Instead, choose a responsible operator that uses an appropriate itinerary, employs trained mountain guides, monitors climbers’ health, and has clear procedures for responding to altitude illness.
Factors That Influence Summit Success
Acclimatisation: Giving your body time to adapt to altitude is one of the most important parts of a Kilimanjaro climb. A longer itinerary generally offers a more favourable opportunity to acclimatise.
Walking pace: Guides often encourage climbers to walk pole pole, a Swahili expression meaning “slowly, slowly.” Maintaining a steady pace helps conserve energy and reduces the temptation to overexert yourself early in the climb.
Hydration and nutrition: Drinking regularly and eating enough can help you maintain energy during long trekking days. Your appetite may decrease at altitude, so small, frequent meals may be easier than large portions.
Physical preparation: Endurance training helps you manage the daily distances and long summit attempt. However, fitness cannot completely prevent altitude sickness.
Guide experience and safety practices: Experienced guides can monitor symptoms, assess changing conditions, and make decisions about whether a climber should continue or descend. Reaching the summit should never take priority over safety.
Personal response to altitude: People react differently to high elevation. Someone who has climbed other mountains or completed demanding endurance activities can still experience altitude sickness.
Understanding Altitude Sickness
Altitude sickness can develop when the body does not adjust adequately to the reduced oxygen availability at high elevation. Symptoms may include headache, nausea, dizziness, unusual fatigue, and loss of appetite. These symptoms should be taken seriously and reported to your guide.
Confusion, difficulty walking straight, breathlessness at rest, or a worsening cough can indicate a serious problem requiring urgent action. A climber with concerning symptoms may need to descend and receive medical attention. Never continue climbing simply because you have already paid for the expedition or are close to the summit.
The best measure of a successful Kilimanjaro climb is not reaching the highest point at any cost. It is making the journey responsibly, following the safety advice of your guides, and returning safely.
4. Machame Route Itinerary: Six-Day Option
A six-day Machame itinerary is a shorter option for climbers who are comfortable with a more demanding schedule. It follows the same general route as the seven-day version but allows less time for acclimatisation. Daily distances, camp arrangements, and walking times can vary according to weather, trail conditions, and the operator’s plan.
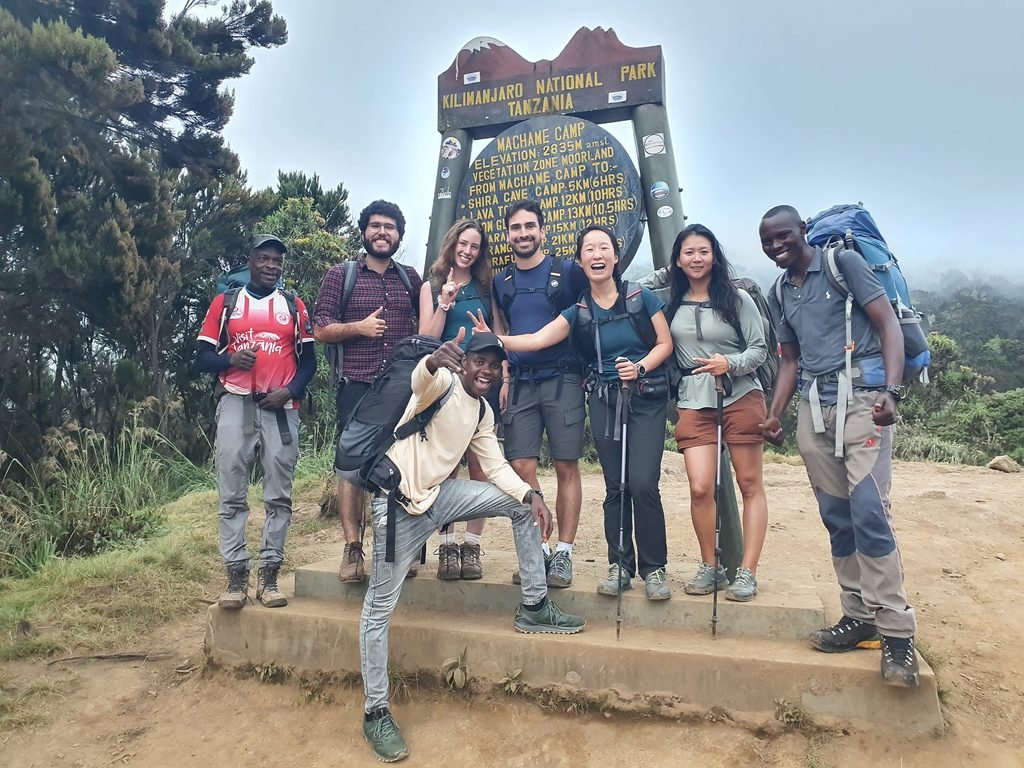
Day 1: Machame Gate to Machame Camp
The adventure begins with a transfer to Machame Gate, where the climbing team completes the registration process and prepares to enter the national park. After meeting the mountain guides and crew, you begin walking through the rainforest.
The trail winds beneath tall trees, with moss-covered branches, thick vegetation, and the sounds of forest birds creating a peaceful atmosphere. The path can be muddy after rain, so walking carefully is important. As you gain elevation, you may notice changes in temperature and vegetation.
After several hours of trekking, you reach Machame Camp, where the crew prepares your tent and evening meal. This is your first night on the mountain. Take time to eat, drink, organise your equipment, and rest before the following day’s climb.
Day 2: Machame Camp to Shira Camp
After breakfast, you leave the rainforest behind and continue climbing towards the Shira Plateau. The trail becomes steeper in places, and the surrounding vegetation gradually changes from forest to heathland and open moorland.
As the trees become less frequent, the landscape opens up, offering views of the mountain and the surrounding plains when the weather is clear. The change in scenery is one of the highlights of the Machame Route.
You continue towards Shira Camp, where the thinner air may make walking feel more difficult than it did on the previous day. Maintain a slow, steady pace and take breaks when needed. At camp, your guides may discuss how you are feeling and remind you to report any symptoms of altitude sickness.
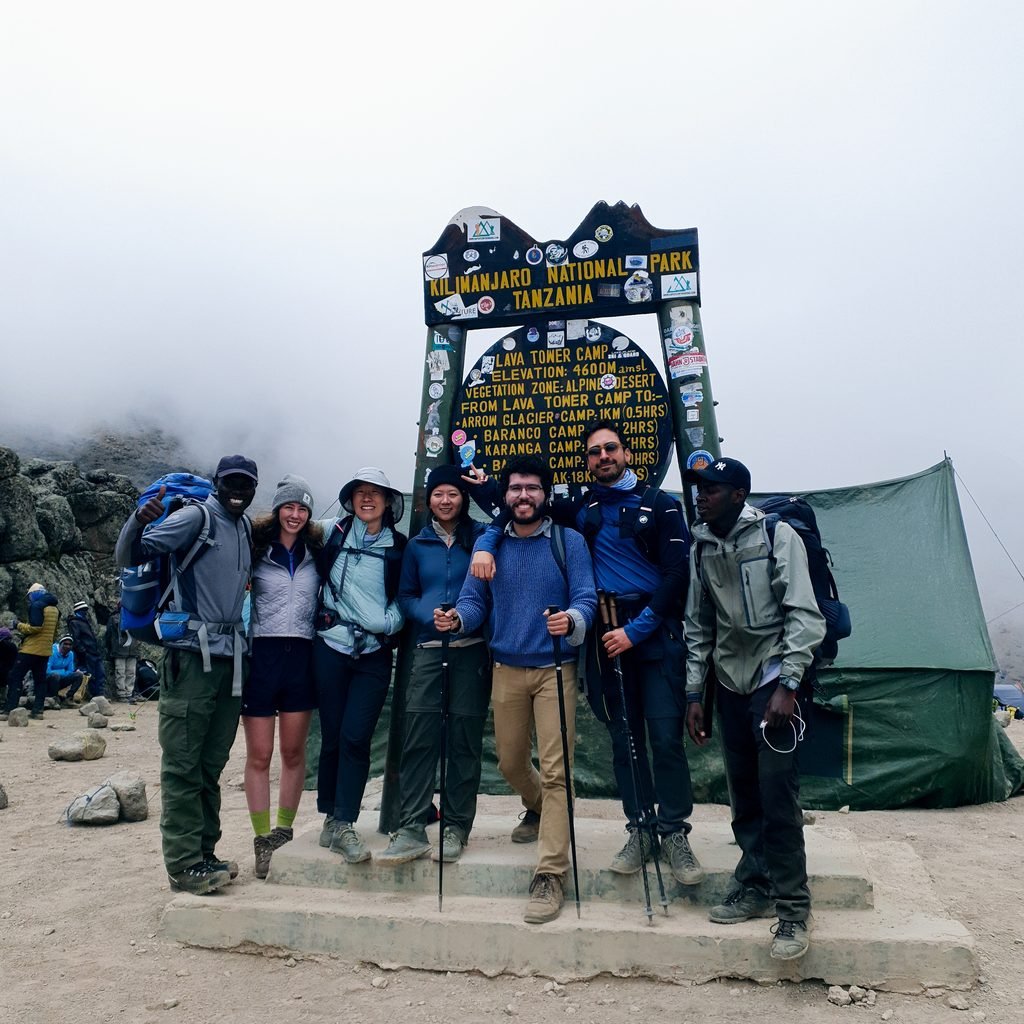
Day 3: Shira Camp to Barranco Camp via Lava Tower
This day is important for acclimatisation because the route climbs to the Lava Tower area before descending towards Barranco Camp. The higher elevation may make the trek feel demanding, even though you eventually sleep at a lower altitude.
The landscape becomes increasingly rocky and exposed as you approach the Lava Tower area. After a break, you descend through changing terrain towards Barranco Valley. This pattern of climbing higher and then sleeping lower is a familiar feature of the Machame Route.
The descent takes you towards Barranco Camp, located beneath the impressive Barranco Wall. The area is known for its dramatic scenery, with steep slopes and distinctive high-altitude plants. In the evening, rest well and prepare for the next day’s climb.
Day 4: Barranco Camp to Barafu Camp
The day begins with the ascent of the Barranco Wall. Although it looks steep, most climbers complete the standard route by carefully following the trail and the guidance of their mountain guides. You may need to use your hands for balance in some places, so move slowly and avoid rushing.
After reaching the top, the trail continues across ridges and valleys before joining the route towards Barafu Camp. The terrain is rocky and increasingly exposed, and the effects of altitude may become more noticeable as you approach high camp.
At Barafu Camp, you have an early meal and prepare for the summit attempt. Your guide will explain the departure time, clothing requirements, and what to expect during the night. Organise your headlamp, warm layers, gloves, water, and snacks before resting. Sleep may be difficult because of the altitude and the early start, but even a period of quiet rest can be helpful.
Day 5: Barafu Camp to Uhuru Peak and Descent to Mweka Camp
Summit day usually begins around midnight. After a light snack and a final equipment check, you start climbing slowly under the night sky. The trail is steep and often covered with loose volcanic scree, while the cold and darkness make the ascent physically and mentally demanding.
Your guide sets a manageable pace and checks how the group is coping. As the hours pass, you climb towards Stella Point on the crater rim. From there, the trail continues towards Uhuru Peak, the highest point in Africa, at 5,895 metres.
Reaching Uhuru Peak can be an emotional moment after days of preparation and effort. Weather permitting, you may see the first light of sunrise across the surrounding landscape. Spend a short time celebrating and taking photographs, while following your guide’s advice about conditions and the need to descend.
The descent begins after the summit visit. You return to Barafu Camp for a short rest before continuing down towards Mweka Camp. This is a long and tiring day, so careful footing is important, particularly on loose scree and uneven ground.
Day 6: Mweka Camp to Mweka Gate
After breakfast, you continue descending through the forest towards Mweka Gate. The air becomes warmer and more humid as you lose altitude, and the vegetation gradually becomes thicker.
At the gate, the climbing team completes the required exit procedures. Depending on the arrangements, successful climbers may receive summit certificates. You then meet your transfer vehicle for the journey back to your hotel, where a shower, a comfortable bed, and a proper meal provide a welcome end to the expedition.
Who should consider the six-day itinerary? This option may suit trekkers with good endurance who understand the demands of high altitude and are comfortable with a tighter schedule. Because it provides less acclimatisation time than the seven-day option, it is important to discuss the itinerary and your experience with a qualified operator before booking.
5. Machame Route Itinerary: Seven-Day Option
The seven-day Machame Route follows a similar trail but adds an extra day to the schedule. For many climbers, this is the more balanced option because it gives additional time for acclimatisation and makes the overall journey less rushed.
Day 1: Machame Gate to Machame Camp
After arriving at Machame Gate and completing registration, you begin the trek through the rainforest. The trail is surrounded by tall trees and dense vegetation, and the ground may be damp or slippery. Your guide sets a steady pace, allowing you to settle into the rhythm of walking with your daypack.
Once you reach Machame Camp, the crew prepares camp and dinner. Use the evening to check your equipment, drink regularly, and rest.
Day 2: Machame Camp to Shira Camp
The trail climbs out of the forest and into heathland and moorland. The route includes steeper sections, but regular breaks and a controlled pace help you manage the effort. As you gain elevation, the views become more open, revealing the mountain’s changing landscape.
You reach Shira Camp later in the day. Because the altitude is increasing, pay attention to how you feel and tell your guide if you experience a headache, nausea, dizziness, or unusual fatigue.
Day 3: Shira Camp to Lava Tower and Back to Shira or an Acclimatisation Camp
On the seven-day version, the exact arrangement for the third day depends on the operator’s acclimatisation plan. Some itineraries travel towards Lava Tower and descend to Barranco Camp on this day, while others adjust the schedule to provide additional time for altitude adaptation. Confirm the camp sequence before booking rather than assuming every seven-day itinerary follows precisely the same plan.
Where an acclimatisation day is included, the purpose is to give your body more time to adjust rather than simply to add distance. Your guide will determine the day’s walking plan according to the itinerary and the team’s condition. Avoid treating an easier day as a reason to walk faster or ignore symptoms.
Day 4: Continue to Barranco Camp
Depending on the schedule, you continue towards Barranco Camp after climbing higher during the day’s trek. The trail passes through rocky terrain and high-altitude vegetation, with views of Kilimanjaro’s rugged slopes.
Barranco Camp is famous for its setting beneath the Barranco Wall. The landscape provides excellent opportunities to appreciate the mountain’s scale, but conditions can change quickly, so keep warm layers accessible. In the evening, eat well, prepare your daypack, and get ready for the ascent of the wall.
Day 5: Barranco Camp to Karanga Camp
You begin the morning by climbing the Barranco Wall. This is one of the most recognisable sections of the Machame Route, and many climbers find it both challenging and enjoyable. Follow your guide’s instructions, keep a safe distance from other trekkers, and take your time on the steeper sections.
After reaching the top, you continue across ridges and valleys towards Karanga Camp. The walking involves repeated ups and downs, so conserve your energy and maintain a comfortable pace.
Arriving at Karanga Camp gives you another opportunity to rest at altitude before moving towards Barafu. Your guide may check your general condition and discuss the plan for the following day.
Day 6: Karanga Camp to Barafu Camp
The trail climbs towards Barafu Camp through rocky and increasingly exposed terrain. The walking distance may be shorter than on some previous days, but the altitude can make the ascent feel demanding.
At camp, prepare for the summit attempt. Organise your warmest clothing, headlamp, spare batteries, gloves, water, and snacks. Follow your guide’s advice about eating, drinking, and resting before the midnight departure.
Day 7: Summit Attempt and Descent to Mweka Gate
The summit attempt normally starts around midnight, when temperatures are very cold and the trail is dark. You climb gradually towards Stella Point, taking breaks when your guide considers them appropriate. From the crater rim, you continue towards Uhuru Peak.
If conditions allow and you are well enough to continue, reaching Uhuru Peak provides a memorable conclusion to the climb. After celebrating briefly, you begin the descent to lower elevations. The return journey is long, and fatigue can affect concentration, so follow your guide’s instructions carefully.
Some seven-day itineraries descend first to Mweka Camp for an overnight stay and complete the walk to Mweka Gate the following morning. Others use a different schedule, depending on the operator’s plan and park regulations. Confirm the final descent arrangements when booking so that the number of days on the mountain and the transfer schedule are clear.
Who should consider the seven-day itinerary? It is often a good choice for first-time Kilimanjaro climbers and travellers who prefer a less rushed schedule. The extra time can support acclimatisation, although the exact benefits depend on the itinerary and each person’s response to altitude.
6. Best Time to Climb the Machame Route
Kilimanjaro can be climbed throughout the year, but weather conditions affect comfort, visibility, and trail conditions. The mountain has two main dry periods that many trekkers consider favourable: approximately January to early March and June to October. These are general seasonal patterns rather than guarantees of good weather.
January to early March often brings relatively clear conditions, although rain, clouds, and cold temperatures remain possible. This period can be attractive for climbers who want a chance of good views and are comfortable with the mountain’s changing weather.
June to October is another popular climbing period. Conditions are often drier, and the route can be busy during peak holiday months. Booking early is sensible if you have fixed travel dates or prefer a particular accommodation and group arrangement.
March to May is generally wetter, particularly during the long rains. Trails can be muddy, visibility may be limited, and wet conditions can make some sections more difficult. Climbers who choose this period should be prepared for rain and should confirm that their operator has appropriate equipment and contingency plans.
November and December may bring shorter rains, although conditions vary from year to year. The mountain can still be climbed, but trekkers should be ready for changing weather.
Regardless of the season, summit temperatures can fall well below freezing, and strong winds can make conditions feel colder. Pack clothing for rain, cold, and changing temperatures rather than relying only on the forecast for the town where your climb begins.
7. Expert Tips for a Successful Machame Route Climb
Preparing well can make your Kilimanjaro climb more comfortable and help you respond to the mountain’s challenges. The following practical tips are useful for both first-time climbers and experienced hikers.
Walk slowly and consistently. The Swahili phrase pole pole is central to Kilimanjaro trekking. A steady pace helps you conserve energy over several days and reduces the temptation to push too hard at the beginning. Let your guide set a suitable rhythm.
Choose an itinerary with sufficient acclimatisation time. A seven-day schedule is often worth considering because it allows more time on the mountain than a six-day option. Ask the operator to explain the actual daily elevations and sleeping camps so you can compare itineraries properly.
Take altitude symptoms seriously. Tell your guide immediately if you develop a headache, nausea, dizziness, unusual fatigue, or other concerning symptoms. Do not hide symptoms because you want to reach the summit. Severe symptoms may require immediate descent and medical care.
Wear broken-in hiking boots. New boots can cause blisters and discomfort during long walking days. Test your footwear before travelling and bring suitable hiking socks. Consider using trekking poles, particularly for steep descents.
Use a layering system. Temperatures vary widely between the rainforest, high camps, and the summit. Bring moisture-wicking base layers, insulating mid-layers, a warm jacket, waterproof outerwear, warm gloves, a hat, and suitable trousers. Your guide or operator can provide a detailed packing list.
Drink regularly and eat enough. Carry water in a system that remains usable in cold conditions, and follow your crew’s guidance about daily fluid needs. Eat meals and snacks even when your appetite decreases, as long as you can tolerate them.
Protect yourself from the sun. Ultraviolet exposure increases with altitude. Sunglasses, sunscreen, and a hat help protect your skin and eyes, even on cloudy days.
Keep your daypack organised. Carry essentials such as water, snacks, rain protection, an extra warm layer, sunscreen, personal medication, and a headlamp. Keep items you may need during the day easy to reach.
Bring a reliable headlamp. Summit night begins in darkness, so a headlamp with spare batteries is essential. Check it before leaving home and test it before the summit attempt.
Listen to your mountain guides. Guides understand the route, local conditions, and common altitude-related problems. Follow their instructions, ask questions when something is unclear, and respect decisions to slow down, stop, or descend.
Prepare mentally as well as physically. The climb can be tiring, especially during summit night. Break the journey into manageable stages, focus on your pace, and remember that reaching a lower camp safely is more important than pushing beyond your limits.
Confirm what your climbing package includes. Before paying a deposit, ask about park fees, camping equipment, meals, drinking-water arrangements, guide and crew support, transfers, emergency procedures, and any additional costs. Clear information helps you prepare a realistic budget and avoid surprises.
8. What to Pack for the Machame Route
Packing carefully is important because you will experience warm, humid forest conditions and freezing temperatures near the summit. Your operator will usually provide a detailed list, but the following items are a useful starting point.
Clothing
- Moisture-wicking base layers.
- Hiking trousers and comfortable trekking shirts.
- Fleece or other insulating mid-layers.
- A warm insulated jacket.
- Waterproof and wind-resistant outer layers.
- Warm hat, neck covering, and insulated gloves.
- Hiking socks and suitable underwear.
- Comfortable, broken-in hiking boots.
- Camp shoes or lightweight footwear for use around camp.
Essential Equipment
- A daypack with a comfortable hip belt.
- A suitable sleeping bag rated for cold mountain conditions.
- A headlamp and spare batteries.
- Trekking poles.
- Water bottles or a hydration system that can be protected from freezing.
- Sunglasses and high-protection sunscreen.
- A camera or phone, if desired.
- Personal toiletries and a small towel.
- Blister-care supplies and any personal medication.
Ask your operator which equipment is supplied and which items you must bring or rent. Sleeping bags, trekking poles, and other equipment may be available for hire, but the quality and cost should be confirmed before departure.
9. What Is Included in a Machame Route Climbing Package?
The services included in a Machame Route package vary by operator, group size, accommodation arrangements, and the standard of service. Always review the written itinerary and inclusions before confirming your booking.
Common Inclusions
Depending on the package, the following may be included:
- Kilimanjaro National Park fees and applicable camping fees.
- Professional mountain guides and supporting crew.
- Meals during the trek.
- Camping equipment, such as tents and sleeping arrangements.
- Drinking-water provision according to the operator’s stated arrangements.
- Transfers between the designated hotel and the mountain gate.
- Emergency procedures and basic first-aid support as specified by the operator.
- Summit certificates for eligible climbers, where provided by park authorities.
Common Exclusions
The following costs may not be included:
- International and domestic flights.
- Tanzania visa fees.
- Travel insurance covering high-altitude trekking and emergency evacuation.
- Accommodation before and after the climb, unless specified.
- Personal clothing and trekking equipment.
- Sleeping-bag or equipment rental, where charged separately.
- Personal snacks and drinks outside the stated meal arrangements.
- Tips for guides, cooks, and porters.
- Personal medication and medical consultations.
- Additional transfers or services not listed in the package.
These lists are general examples, not a guarantee of what a particular package includes. Request a complete written breakdown before booking.
10. Why Choose EKO Tanzania Adventures for Your Machame Route Climb?
Climbing Mount Kilimanjaro is a major undertaking, and choosing the right local operator is an important part of preparing for the experience. A well-organised climb should include a clear itinerary, appropriate equipment, reliable communication, and a mountain team that takes climber safety seriously.
EKO Tanzania Adventures can help you plan your Machame Route climb around your travel dates, fitness level, preferred itinerary, accommodation needs, and budget. Whether you are travelling alone, with a partner, or as part of a group, discuss your expectations before booking so the arrangements match your needs.
When comparing climbing packages, ask about the number of days on the mountain, sleeping elevations, guide-to-climber arrangements, emergency procedures, equipment standards, and the support provided to the mountain crew. It is also important to understand the payment schedule, cancellation policy, and any costs that are not included in the advertised price.
A responsible climbing experience is about more than reaching the summit. It also involves preparation, communication, respect for the mountain environment, and the well-being of the people who make the expedition possible.
Book Your Machame Route Kilimanjaro Climb with EKO Tanzania Adventures
Are you ready to experience Mount Kilimanjaro through the scenic Machame Route? EKO Tanzania Adventures can help you plan your climb, understand the differences between six-day and seven-day itineraries, and prepare for the conditions you may encounter on the mountain.
Contact the team to discuss your travel dates, the number of climbers, your preferred itinerary, accommodation arrangements, and budget. You can also ask for guidance on packing, physical preparation, and what to expect during the summit attempt.
EKO Tanzania Adventures
- Website: https://ekotanzaniaadventures.com
- WhatsApp / Call: +255 761 353 184
- Email: info@ekotanzaniaadventures.com
- Alternative Email: ekotanzaniaadventure@gmail.com
With thoughtful preparation, a suitable itinerary, and a strong focus on safety, the Machame Route can be a rewarding way to experience Africa’s highest mountain. Take your time, respect the altitude, follow your guides’ advice, and enjoy every stage of the journey towards Uhuru Peak.